How to Make GitHub Actions
Posted on Fri 19 June 2020 in CICD • 4 min read
From a recent post on this blog on how to use GitHub Actions to easily integrate CI/CD into your repository, this post will go into how to create your own GitHub Action!
This post was inspired from developing a few GitHub Actions of my own, which I recently released!
PyInstaller GitHub Actions
Do you ever want to share your Python code with others, but they don't have Python installed?
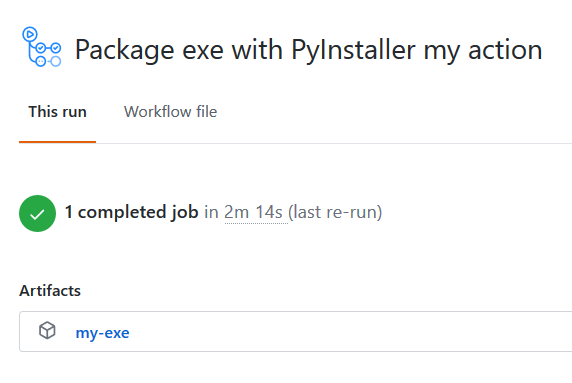
You can now easily package your code up as an executable (*.exe) file with GitHub Actions!
- Windows: https://github.com/marketplace/actions/pyinstaller-windows
- Linux: https://github.com/marketplace/actions/pyinstaller-linux
Once activated on your repository, each time you push, the action will be kicked off and upload a packaged application to your repository.
Interrogate GitHub Action
Interrogate checks your docstring coverage, integrate it easily into your CI workflow with GitHub Actions.
https://github.com/marketplace/actions/python-interrogate-check
How These Actions were Made
Currently GitHub actions supports two types of actions out of the box (with subsequent documentation):
The actions mentioned above are all Docker actions, so this post will focus on how to create Docker GitHub actions. The two tutorials linked above are a great resource for creating GitHub Actions. To summarise the 'creating a docker container action' page linked above, we need a few elements to get a basic docker action working:
- README
- Dockerfile
- entrypoint.sh
- action.yml
Let's take the Interrogate Action as the example on how it was made:
README
This is essentially the 'documentation' behind an action, it should prescribe:
- What the action does
- Why someone should use it
- How to integrate it into a CI/CD workflow
- Descriptions of any inputs or outputs
Dockerfile
For those that haven't used Docker before, this may be the most daunting part. Essentially a Dockerfile is a set up of steps that should be run when starting the container (aka booting the computer). There's a multitude of available containers developed by the community to handle most of the underlying steps for you. In the case of the interrogate action, we use the container image python:3.8.1-alpine. What this does, it pulls a copy of the alpine distribution of Linux, pre-configured with Python for us and spins it up. See more variants of Python docker images here https://hub.docker.com/_/python.
Consider a container as a standalone object, when you start it, it won't have any of your files automatically copied into it, so you have to add any files specifically that you may need. Next we copy both the requirements.txt & entrypoint.sh from the repository into our container. Fantastic now we can do something with them. We upgrade pip, install any requirements (eg, interrogate) and then finish up by starting the shell script entrypoint.sh.
Action.yml
The action.yml file contains all the metadata around the action. The syntax is well defined here https://help.github.com/en/actions/creating-actions/metadata-syntax-for-github-actions. The things you'll want to include in this file are:
- The name & description of the action
- The branding of the action (eg, the 'logo' looks for the action on the marketplace)
- There's a really good cheat sheet for branding here: https://github.com/haya14busa/github-action-brandings
- Inputs & Output
- How the action runs (on the Dockerfile in this case)
- What arguments to pass to the runner (Docker)
All the arguments defined here if specified in the args under the runs tag will passed to the next file (entrypoint.sh) upon runtime.
Entrypoint.sh
The entrypoint.sh is the equivalent of opening a terminal on the freshly booted PC, and running commands inside it, and thus the formatting is very specific. Ensure to follow the operating system's convention for the docker image that you are using. In this case, it was Linux, so bash is our convention.
First off in the entryooint we need to enable options, this is done in bash using the command set. For most GitHub actions, they should at least enable the option to exit on first error with set -e, as this will make the CI/CD fail under that circumstance. For the interrogate action, we also enable export of all variables, and to trace our commands (prints them to the console), with set -eax. You can find more bash options here: https://www.tldp.org/LDP/abs/html/options.html.
As mentioed before, now it's time to interact with our arguments. These arguments are contained in a numeric variable as listed in action.yml under args (eg, $1, $2, etc). These arguments can then be used in CLI commands and more!
For the interrogate action in particular, the output of the CLI for the package contains a string of 'PASSED' if the coverage is higher than the fail-under argument. In the entrypoint.sh we call the interrogate CLI to check our package and then check the output if it contains 'PASSED' with grep. Grep is one of the most useful utilties as apart of linux, find out more about grep at https://man7.org/linux/man-pages/man1/grep.1.html. If the coverage failed, we still run the interrogate CLI to generate a badge if the user wanted to, except exit out of the shell file with exit 1 so this fails the action on GitHub; otherwise exit with exit 0 to pass!
Publish to Marketplace
Once you've implemented these few files, you should get a warning at the top of the repository on GitHub hinting if you want to publish this on the marketplace. This is done smoothly with creating a release of your project, and that's it, done!
Now users can intergrate your action into the CI/CD pipeline as easily as:
1 2 | |
Personally, I absolutely love the building block structure of actions so you can piece together all the actions you want to get where you want to go so much easier!