Releasing Cordova Apps on Google Play & App Store
Posted on Fri 11 December 2020 in Software • 4 min read
This post is going to go into how to upload and release a Cordova app on both the Google Play Store and the Apple App Store. Cordova is an open source framework that wraps HTML/Javascript apps into a native container which can access the device's functionality, akin to a 'borderless windowed' browser on a mobile device. The beauties of Cordova is it enables developers to have a single codebase which builds to:
- Android
- iOS
- Windows
While this post is not going to go into how to develop a Cordova app, and makes the assumption that we have a Cordova app ready to go to upload. Other assumptions that have been made that the developer has set up an account with the respective store (make note that to become an Apple Developer it's a $99 USD per year price and a Google Play developer is a $25 USD one-time fee).
Building the App
There's thorough documentation on these steps found at: https://cordova.apache.org/docs/en/latest/guide/cli/
Once cordova has been installed and configured to reflect the app, it's time to build the app in the respective target platforms (note to add platforms it's as easy as cordova platform add android). If both platforms have been added (eg, iOS/Android), then running cordova build will build for all platforms enabled. Once built, there will be folders found within ./platforms for each platform respectively in which there will be a:
- Android Studio Project
- XCode Project (iOS)
These can be opened within the native editors Android Studio and XCode, and will be required for the following steps. This is also a fantastic point to deploy the built app onto physical devices to test everything works as expected.
Google Play Store
First of all, once your developer account is set up, head to Google Play Console, as this will be the main point of contact for the app on the Google Play Store. Once you've successfully created your app on Google Play Console, it's now time to create a new release for your app. This is within Production > Release Dashboard, and is time to fill in all the details such as release notes, etc. Under Build, it should be a prompt to say 'Upload your files (.aab, etc)' and this is the file that we'll be creating in the next step.
Bundling in Android Studio
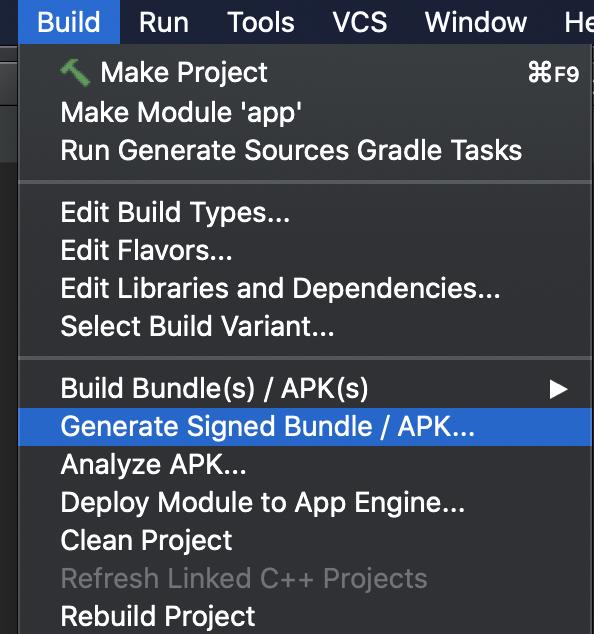
Provided the app built successfully, and tested fine on a physical device, it's now time to generate a signed bundle/apk. Open Android Studio and open the project found in ./platforms/android. Once open gradle will compile your app and have it ready to be deployed to a device, after gradle has finished running (and likely asking for updates), head to the Build tab in the navigation bar, this is where we can find the option to Generate Signed Bundle / APK, by clicking this will initiate the wizard.
Now it's time to decide whether to bundle an Android App Bundle or an APK, and this will be specific for the project, but most likely going with Android App Bundle will be the better option.

Now it's time for the signing, and there's thorough documentation over on Android Developers (https://developer.android.com/studio/publish/app-signing) for going through these steps and covers all the scenarios such as:
- New app to be released
- Existing app to be updated
After following these steps an .aab file will be generated for your app which can then be uploaded into Google Play Console and thereafter released!
App Store (iOS)
Once you've signed up for the Apple developer program, head to App Store Connect and create a new app on the platform. This will be the main point of contact for the app on the Apple App Store. Once set up, it's time to create a new release for the app, which is the blue plus button underneath the app name. This will prompt you to fill in details such as release notes, etc and select a build. But likely, there won't be any builds to select from, which is a problem, so let's solve that.
Uploading the Build to App Store Connect
Now there's many ways to achieve this (eg, Transporter, XCode, etc). But let's focus on uploading it through the Archive process within XCode which I've personally found to be the most straightforward and simplest way. This means we'll need to open XCode and open the project file found in ./platforms/ios/APP_NAME.xcodeproj. This will likely ask you to update many things as XCode is consistently getting updates. Note that once opened, there will be 3 potential target 'Schemes' in XCode which is directly next to the run button in the top left. Those 3 schemes will be Cordova, CordovaLib & Your App, ensure to have your app selected as the scheme before moving forward. This is the perfect time to deploy your app to a physical device and test all functionality.
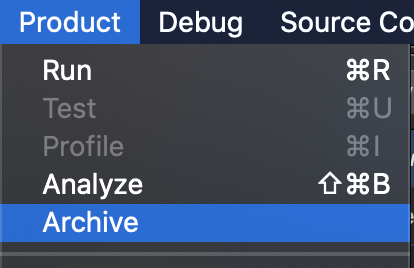
Provided the app has built and deployed to a device (whether simulated or physical), it's time to get it sent to App Store Connect ready for release. Ensuring that you've selected the target device as Any iOS Device (arm64), this will enable us to have the Archive option in the Product tab of the navigation menu.

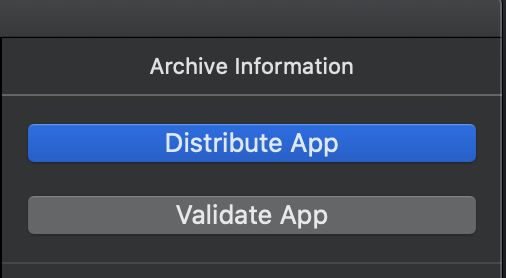
Upon archiving the project, this will build the project and bundle it with whichever developer certificates you've enabled with your XCode account. Finally opening Organizer when finished (and can be found within Window > Organizer) containing all previously built versions of this project. By then selecting the version which was archived, we can then send this straight to App Store Connect via the Distribute App button.
Once clicking this option, it'll go through the process of validating all certificates and such, and send it straight to your Apple Developer account. Now's the time to head back to App Store Connect (after some time), for which that select build button will now have an option and allow you to submit your app to the Apple App Store!